
This article contains affiliate links for advertisers of this site. See our disclosure page for more information.
Your plants have been outside all summer- what should you spray on plants before bringing them indoors?
There are a lot of advantages to keeping houseplants outside for the summer- the bright light and increased humidity are ideal growing conditions.
The one question I always get asked is “What to spray on plants before bringing indoors so I don’t bring in bugs?”
In this article, I review the step-by-step process for acclimating your plants to an indoor environment without bugs!
![]()
When to Bring Plants Inside
The goal is to have plants acclimated to their indoor environment before night temperatures drop below 50 degrees Fahrenheit.
This is usually 2-4 weeks before the first frost date.
Plants that aren’t hardy (most tropicals and succulent houseplants) will incur damage or even death when exposed to temperatures less than 50 degrees Fahrenheit.
The first frost in my area averages the first or second week of October, so I like to have my plants indoors by September 15th.
Therefore, I begin the acclimatization process in late August or early September.
This allows me 7-14 days to prepare the plants for the indoor environment.

How to Move Plants from Outside to Inside
The first step is to move the plants to a shady outside location so that they only receive indirect light.
Begin this process as soon as possible- preferably 14 days before the date the plants will be moved inside.
This helps the plant adjust to the lower light levels and cooler temperatures that it will receive indoors.
Even if you use a grow light inside, it rarely provides the same intensity that the summer sun provides.
This is an important step because plants respond to drastic changes in light, temperature, and humidity by dropping large numbers of leaves!
The longer a plant is allowed to adjust to an environmental change, the better it will grow in its new location.

How to Debug Plants- The Steps
The first step is to visually check the top and underside of leaves (especially new growth) for the presence of insects.
Any plants that have a bug problem should be quarantined from the rest.
However, assume that if one plant has a bug problem, the remaining could have an infestation, even if there isn’t a visual presence.
Click here for information about treating and identifying specific bug problems.

For plants that are of a manageable size, I like to gently remove the pots to see the condition of the root ball.
Sometimes there is a visible bug that I can physically remove.
Occasionally pillbugs and sowbugs enter through drain holes and are easy to remove.
It’s also a good way to gauge if the plant needs more soil or if it should be repotted.
This is a great time to repot any plants that outgrew their container over the summer.
Next, while the plants are outside, use a garden hose and apply a strong stream of water to the foliage.
This is an effective, organic way to remove any small insects and their eggs.
I also thoroughly water the soil.

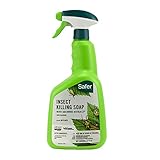
The Spraying Process
Then spray the underside and leaf surfaces with insecticidal soap made for horticultural use.
Read and follow all label instructions.
Return the plant to the shady outside location for 5-7 days.
Then, apply the insecticidal soap a second time to the leaves.
Maintain the plant in a shady location and after another 5-7 days it’s time for the final preparations for the plants to come indoors!
If you feel there may be a few rogue bugs in your plants’ soil or pots, the next step will take care of them, otherwise, it’s optional.
On the day you plan to move the plants indoors, immerse each plant’s pot in a bucket of lukewarm water for 15-20 minutes.
This will cause any remaining bugs in the soil mix to float to the surface of the water.
Then thoroughly spray the leaves again with insecticidal soap.
This third application of insecticidal soap will kill any remaining insects that were in an early developmental stage and ensure your plants are bug-free!
The final step is to wipe the surface of the containers to remove any soil or debris.
When the pots and leaves are dry, they are ready for their new home indoors!
Example Midwest Timeline for How to Move Plants from Outside to Inside:
September 1- Move plants to a shadier location outside
September 2- Inspect plants for bugs; remove yellow, brown leaves; repot any plants as needed; spray plants with insecticidal soap
September 9- Spray plants with 2nd application of insecticidal soap
September 15- Soak pots in lukewarm water to remove possible bugs in the soil (optional), 3rd spray with insecticidal soap, and place indoors!
![]()
Tips for What to Spray on Plants Before Bringing Indoors
- Avoid spraying plants on hot days. This can stress the plants and cause burning.
- Keep plants in a shady, cool location when spraying. The combination of sun and soap can cause leaves to burn.
- Several brands of insecticidal soap do not recommend using it on delicate ferns, check the label first.
- There are a lot of Internet “recipes” for making your own insecticidal soap. Avoid this temptation as household cleaning products weren’t designed for horticultural use. They have detergents, dyes, and fragrances that are not designed for use on plants. Some may work, while others may be extremely caustic to plants.
What do I do with plants with ants scattering everywhere when picked up?
Hi Caryn, Insecticidal soap will work on ants. The pot submersion technique in this article is a great way to take care of ants.Thanks, Shannon
Great guide for bringing plants indoors bug-free! Check leaves, use insecticidal soap, and soak pots to ensure a smooth transition. Happy gardening indoors!
Have made notes on winterizing. Had some trouble in the past with insects coming in. Plan to use your suggestions.
Great, thanks, Margaret! Best wishes! -Shannon
When submerging the potted plant into water, how does the soil in the pot not all float to the surface of the water?? Some of my plant have fairly loose soil…
Hi Marci, great question! I always water the plants thoroughly first so that the soil is heavy and holds together a bit better. Some of the soil on the top will probably fall away so just replace with fresh soil. This step is optional and if your plants aren’t well-rooted in the pot it probably isn’t the best idea. Thanks! Shannon
Thanks for the recommendation…had a few issues in the past when I move some plants from outside to inside..!!!
So ready to try it…❤️
Best wishes! Sincerely, Shannon
After I clean and repot my outdoor plants, can I use “raised bed soil” for my indoor plants?
Hi Grace, I would recommend using mix that is designed for indoor containers. An all-purpose indoor container mix is good for tropicals, use a separate mix designed specifically for succulents and cacti. We have an article that will be helpful with this https://trilliumlivingllc.com/choosing-soilless-potting-mix/ Best wishes! -Shannon
Great information as I have been wintering succulents indoors for a number of years now and would like to improve how they do.
I’m glad you found this helpful, Doria!
Thank you for this knowledge on wintering outdoor plants! I definitely will use all of this information.
I’m so glad you found it useful, Renee!
Wow thanks for the info ive grown cacti and succulents for a long time now and now that i put the word out there for sale now alls i got left are my cuttings so now im in big demand for more but ive gotts tell people im out of stock thats sellabe except for pups and cuttings and they even want them but me myself i wont sell some if there even the slightest dought they wont make it there to you and im kinda a perfectionest i look the pups ove and if i wouldnt purchase it at that price then im in no way gonna sell them theve gotta be 100 percent healthy at my choice